既存アプリケーションのソースコードを読むとき、最初に困るのは「どこから見ればいいのか」が分からないことです。
小さなアプリでも、UI、設定、外部ツール、ファイル入出力、非同期処理、キュー処理などが絡むと、ソースを開いただけでは全体像が見えにくくなります。
そこで今回は、先日開発した NaviMovie-Maker を題材に、AIを使ったリバースエンジニアリングの実験を行いました。
目的は、AIにソースコードを読ませて説明文を作らせることではありません。
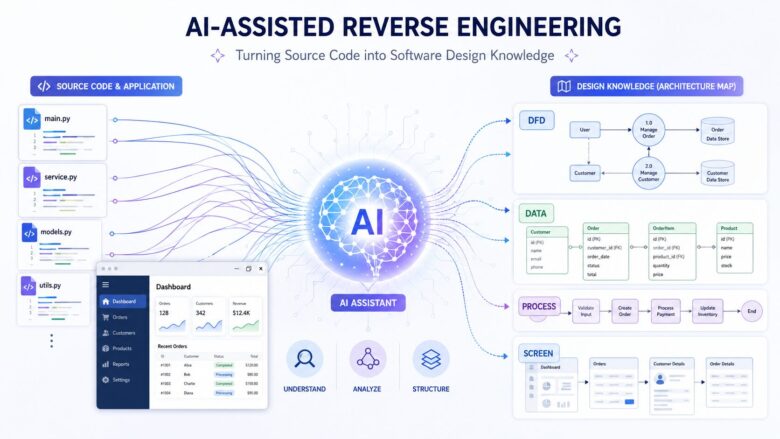
ソースコードから、Model Weave形式の設計モデルを生成し、DFD、データ定義、業務フロー、画面モデルとして可視化できるかを試すことです。
実験の目的
今回の実験では、次の点を確認しました。
- 前提知識のないAIが、ソースコードからアプリ構造を把握できるか
- DFD、DATA、Process、Screen といった設計モデルに落とし込めるか
- 生成したMarkdownがModel Weave上で図として表示できるか
- 警告や診断を使って、AI生成モデルを修正できるか
- 小規模アプリの初期理解に使えるレベルの「設計地図」になるか
以前、Model Weave自身を対象にDogfoodモデルを整備しましたが、そのときは自分が設計背景を理解している状態であり、結構細かい指示を与えながら作成していました。
ですが、これでは公平な実験とは言えないと感じました。
開発現場で可視化がなされていないシステムをメンテナンスする場面で、これほど設計背景を理解している前提で作成する事はないからです。
そこで今回は、より実践に近づけるため、AIが参照できる情報を限定しました。
AIに渡した情報
AIに参照させた情報は、以下に限定しました。
- NaviMovie-Maker のソースコード
- README / release docs
- Model Weave のフォーマット文書
- Dogfood実験で得られた生成ルールや注意点
- プロンプトで指定した作業指示
逆に、以下は禁止しました。
- Web検索
- 過去会話の文脈利用
- ソースにない仕様の推測
- アプリ本体ソースの変更
- Git操作
- 一時ファイルや補助スクリプトの作成
つまり、かなり限定された条件で、ソースコードとドキュメントだけから設計モデルを作らせました。
作成されたモデル
AIに指示を出すと、10分ほどで、以下のようなModel Weaveモデルを生成しました。
- DFD:アプリ全体の境界とデータフロー
- DFD Object:UI、キュー、ダウンロード、変換、設定、外部ツール、ファイルシステムなど
- DATA:設定、変換ジョブ、キュー項目、プリセット、出力ファイル、外部ツール情報など
- Process:キュー追加、ダウンロード後変換、ローカル変換、コピーのみ、プリセット適用、外部ツール解決、設定保存など
- Screen:WPFのMainWindow構造
- Findings note:解析結果と不確実点のまとめ
一発生成としてはかなり良い結果でした。
特にDFDでは、NaviMovie-Makerの主要な境界が自然に抽出されていました。
- User
- Main Window / UI
- Application Controller
- Queue
- Download Service
- Conversion Service
- Settings
- External Tools
- File System
このあたりは、人間が見ても妥当な分割です。
DFDから固める流れが自然に出た
興味深かったのは、AIがまずDFD周辺から構造を固めるような進め方をしていた点です。
これはDogfood実験から得られた知見としてナレッジに含めている内容と一致していました。
既存ソースをリバースエンジニアリングする場合、いきなり詳細なクラス図を作るより、まずは境界を把握した方が安定します。
たとえば、NaviMovie-Makerでは次のような処理境界が見えます。
- UIからキューへ入力する
- キューからダウンロードまたは変換へ流れる
- 変換処理はffmpegを呼び出す
- ダウンロード処理はyt-dlpを呼び出す
- 設定はJSONとして保存される
- 出力ファイルはファイルシステムに作られる
このような構造はDFDと相性が良く、初期理解に役立ちます。
警告も役に立った
生成直後のモデルには、いくつかModel Weaveの警告が出ました。
たとえば、DFD objectのkindに external_entity が使われていたため、Model Weaveの対応するkindに修正する必要がありました。
また、data_objectで ## Fields の直後に ## Source Links を置くと、Source Linksの表がFieldsとして誤認識されるケースがありました。
この場合、次のように ## Notes を挟むことで警告が消えました。
## Fields

...

## Notes

- このデータはソース上の関連クラスを論理的にまとめたもの。

## Source Links

| path | notes |
|---|---|
| NaviMovieMaker.App/Services/VideoConversionService.cs | 変換処理 |
これはかなり重要な発見でした。
AIが生成したMarkdownをModel Weaveで表示し、警告を見て修正することで、モデルの品質を上げることができます。
つまり、AI生成の結果をそのまま信用するのではなく、Model Weaveの診断を使って検証できます。
Codex使用量も小さかった
今回の実験では、NaviMovie-Maker全体のソースを対象に、DFD、DATA、Process、Screen、Findings noteを一括生成しました。
その後の警告修正まで含めても、Codexの使用量は週次上限の約4%に収まりました。
開発時にはこの数倍のトークンを消費したものですが、人間が理解する文章はコードよりも粒度の粗い情報だからなのかもしれません。
これは良い結果です。
小規模な既存アプリであれば、AI利用量を大きく消費せずに、初期設計地図を作れる可能性があります。
また、解析を行う上ではソースコードを全量解析させるよりもトークンを節約できることも期待できます。同じ結果を得られるのであれば、よりエコな選択を行うべきだと思います。
もちろん、大規模システムでは一括処理ではなく、領域ごとに分割する必要があると思います。
それでも、最初の地図を作る用途としては十分に現実的です。
今回分かったこと
今回の実験で分かったことは、次の通りです。
- 小規模アプリなら、AIだけでも初期の設計地図をかなり作れる
- DFDから始めると、境界が見えやすい
- DATAとProcessを組み合わせると、実装理解がかなり進む
- Screenモデルは、WPFのXAMLとコードビハインドの理解に役立つ
- Model Weaveの警告は、AI生成物の品質確認に使える
- ソースコードの要約ではなく、構造化された設計モデルにすることで再利用しやすくなる
- AI利用量も小規模アプリでは現実的な範囲に収まる
特に大きいのは、AIの出力を「文章の要約」で終わらせなかった点です。
Markdownで構造化し、Model Weaveで図として見られる形にしたことで、後から人間がレビューしやすくなりました。
AIリバースエンジニアリングで重要なこと
AIで既存システムを解析する場合、単に「このソースを説明して」と聞くだけでは不十分です。
必要なのは、出力形式を決めることです。
今回の場合は、次のように決めました。
- アプリ全体はDFDで見る
- 主要データはDATAモデルにする
- 主要ユースケースはProcess / Business Flowにする
- 画面はScreenモデルにする
- 不確実点はFindings noteに残す
- Source Linksで実ソースに戻れるようにする
これにより、AIの出力が単なる文章ではなく、設計資産として残せる形になります。
実際に使ったプロンプト
今回の実験では、AIに自由に設計させたわけではありません。
むしろ、かなり強い制約をかけました。
ポイントは次の通りです。
- 参照してよい情報源を限定する
- 出力先を
model/配下に限定する - ソースコードは変更させない
- Git操作を禁止する
- Model Weave のフォーマット文書を先に読ませる
- Dogfood実験で得た安全記述ルールに従わせる
- DFD / DATA / Process / Screen / Findings note を一括生成させる
- 不明なものは推測で作らず、Findings note に残させる
実際のプロンプトは、概ね以下のような内容です。
以下はプロンプト例です。もし同様の事をお試しの際の参考になればと思います。
Proceed with one-shot Model Weave reverse engineering for NaviMovie-Maker.

Goal:
Generate a first-pass Model Weave model set for NaviMovie-Maker from the provided source code and provided Model Weave documentation only.

This is an experiment to evaluate whether an AI with no prior project knowledge can visualize a small application using only:
- target application source code
- target application README / release docs
- Model Weave format documentation
- Model Weave dogfood guidance notes
- this prompt

Do not use previous chat context.
Do not use external knowledge.
Do not use web search.
Do not infer product intent beyond the source, README, release docs, and provided documentation.

Workspace root:
navimovie-maker-reverse-root

Actual workspace structure:
navimovie-maker-reverse-root/
├─docs/
│  └─docs/
│      ├─99_notes/
│      └─formats/
└─navimovie-maker/
    ├─NaviMovieMaker.App/
    │  ├─Assets/
    │  ├─Models/
    │  └─Services/
    └─release-docs/

Target application source:
- navimovie-maker/
- navimovie-maker/NaviMovieMaker.App/
- navimovie-maker/release-docs/

Model Weave documentation and guidance:
- docs/docs/formats/
- docs/docs/99_notes/

Allowed information sources:
- navimovie-maker/**
- docs/docs/formats/**
- docs/docs/99_notes/**
- this prompt

Strictly forbidden:
- Do not use web search.
- Do not run git commands.
- Do not create commits.
- Do not push.
- Do not edit NaviMovie-Maker source code.
- Do not edit files under docs/.
- Do not edit README or release docs.
- Do not modify build outputs.
- Do not create temporary helper scripts or scratch files.
- Do not run destructive commands.
- Do not invent behavior not supported by source, README, or release docs.
- Do not model future/planned behavior unless it is explicitly described in source, README, or release docs.
- Do not create generated Model Weave files inside navimovie-maker/.
- Do not create generated Model Weave files inside docs/.

Allowed actions:
- Read files.
- List directories.
- Search source code with grep/rg or equivalent.
- Create directories and files only under model/.

Before generating any model files:
1. Locate the target application source under navimovie-maker/.
2. Locate Model Weave format docs under docs/docs/formats/.
3. Locate dogfood guidance notes under docs/docs/99_notes/.
4. Read and follow the required guide files if present:
   - docs/docs/99_notes/GUIDE-MW-AI-GENERATION-RULES.md
   - docs/docs/99_notes/GUIDE-MW-FRONTMATTER-SAFE-WIKILINK.md
   - docs/docs/99_notes/GUIDE-MW-MARKDOWN-TABLE-SAFE-CELL.md
   - docs/docs/99_notes/REPORT-MW-SOURCE-DRIVEN-DOGFOOD-FINDINGS.md
   - docs/docs/99_notes/STATUS-MW-IMPLEMENTATION-COVERAGE.md
5. Read the current format documents before creating model files:
   - docs/docs/formats/FORMAT-dfd_diagram.md
   - docs/docs/formats/FORMAT-dfd_object.md
   - docs/docs/formats/FORMAT-data_object.md
   - docs/docs/formats/FORMAT-app_process.md
   - docs/docs/formats/FORMAT-screen.md
6. Do not assume table schemas from memory. Use the provided format docs.

Output directory:
Create all generated Model Weave files under:
model/

Use this structure:
model/
  01_dfd/
    diagrams/
    objects/
  03_data/
  04_process/
  09_screen/
  99_notes/

Language rules:
- User-facing model prose must be Japanese.
- Source symbols, class names, method names, file paths, and model IDs may remain English.
- Keep explanations concise.
- Prefer source-backed facts over speculation.

Markdown table safety rules:
- Follow GUIDE-MW-MARKDOWN-TABLE-SAFE-CELL.md.
- Keep table cells short.
- Do not use C# / TypeScript array notation such as Foo[] or Array<Foo> in tables.
- Use Foo list or list of Foo instead.
- Do not use Wikilink aliases such as [[target|label]] inside tables.
- Avoid raw pipe characters inside table cells.
- Put long explanations in ## Notes instead of table cells.
- Do not leave empty placeholder rows.

Frontmatter / Wikilink rules:
- Follow GUIDE-MW-FRONTMATTER-SAFE-WIKILINK.md.
- Avoid Wikilinks in frontmatter unless the format explicitly supports them safely.
- Prefer plain IDs in frontmatter fields.
- Use Wikilinks in body tables only where Model Weave format examples support them.

Model ID rules:
- Use prefix NMM for NaviMovie-Maker.
- Use stable IDs.
- Do not use spaces in IDs.

Examples:
- DFD-NMM-CORE-L0
- DFD-NMM-OBJ-UI
- DFD-NMM-OBJ-CONVERSION
- DATA-NMM-CONVERSION-JOB
- PROC-NMM-CONVERT-LOCAL-FILE
- SCR-NMM-MAIN-WINDOW

Reverse engineering scope:
Process the whole small application in one pass.

Inspect at minimum:
- navimovie-maker/README.md if present
- navimovie-maker/release-docs/**
- project files such as .csproj
- WPF XAML files
- ViewModels if present
- Models
- Services
- Settings / configuration code
- queue / job handling code
- download logic
- conversion logic
- preset logic
- external tool integration
- ffmpeg / yt-dlp integration if present

Ignore:
- .git/
- bin/
- obj/
- generated build outputs
- IDE metadata
- package/cache directories

Required generated models:

1. Core DFD

Create:
model/01_dfd/diagrams/DFD-NMM-CORE-L0.md

Purpose:
Represent the main runtime boundaries and data flows of NaviMovie-Maker.

Include boundaries only if source-backed:
- User
- Main Window / UI
- ViewModel / application controller
- Queue / job manager
- Download service
- Conversion service
- Preset / settings service
- External tools
- File system

Use current FORMAT-dfd_diagram.md.
Do not assume DFD table schemas from memory.

2. DFD objects

Create small DFD object files for source-backed boundaries.

Likely candidates:
- model/01_dfd/objects/DFD-NMM-OBJ-USER.md
- model/01_dfd/objects/DFD-NMM-OBJ-UI.md
- model/01_dfd/objects/DFD-NMM-OBJ-APP-CONTROLLER.md
- model/01_dfd/objects/DFD-NMM-OBJ-QUEUE.md
- model/01_dfd/objects/DFD-NMM-OBJ-DOWNLOAD.md
- model/01_dfd/objects/DFD-NMM-OBJ-CONVERSION.md
- model/01_dfd/objects/DFD-NMM-OBJ-SETTINGS.md
- model/01_dfd/objects/DFD-NMM-OBJ-EXTERNAL-TOOLS.md
- model/01_dfd/objects/DFD-NMM-OBJ-FILE-SYSTEM.md

Create only objects supported by source, README, or release docs.

3. DATA models

Create concise DATA models for important runtime data.

Likely candidates:
- model/03_data/DATA-NMM-APP-SETTINGS.md
- model/03_data/DATA-NMM-CONVERSION-JOB.md
- model/03_data/DATA-NMM-QUEUE-ITEM.md
- model/03_data/DATA-NMM-CONVERSION-PRESET.md
- model/03_data/DATA-NMM-DOWNLOAD-REQUEST.md
- model/03_data/DATA-NMM-OUTPUT-FILE.md
- model/03_data/DATA-NMM-EXTERNAL-TOOL.md

Use source-backed field names where possible.
Do not model every minor property if it does not help understanding.

For data_object files, use this section order:
1. ## Summary
2. ## Fields
3. ## Notes
4. ## Source Links

Do not place ## Source Links immediately after ## Fields.

4. Process / Business Flow models

Create structured app_process models with table-based ## Steps and ## Flows.

Preferred workflows:
- model/04_process/PROC-NMM-ADD-FILE-TO-QUEUE.md
- model/04_process/PROC-NMM-DOWNLOAD-AND-CONVERT.md
- model/04_process/PROC-NMM-CONVERT-LOCAL-FILE.md
- model/04_process/PROC-NMM-COPY-ONLY.md
- model/04_process/PROC-NMM-APPLY-PRESET.md
- model/04_process/PROC-NMM-RESOLVE-EXTERNAL-TOOLS.md
- model/04_process/PROC-NMM-SAVE-SETTINGS.md

Create only workflows that are clearly source-backed.
If a workflow is unclear, omit it and mention it in the findings note.

Business Flow requirements:
- Use type: app_process.
- Use current FORMAT-app_process.md.
- Every Flows.from and Flows.to must match a local Steps.id.
- Do not use external model IDs as Flows.from or Flows.to.
- Use compact branch conditions only when source-backed.
- Keep diagrams readable.

5. Screen model

Create:
model/09_screen/SCR-NMM-MAIN-WINDOW.md

Purpose:
Represent the main UI structure from WPF/XAML and ViewModel behavior.

Include if source-backed:
- main fields
- buttons
- mode selection
- queue display
- preset selection
- output path / file selection
- progress / status display
- main user actions mapped to process models

Do not model pixel-level layout.

6. Findings note

Create:
model/99_notes/REPORT-NMM-REVERSE-ENGINEERING-FINDINGS.md

Include:
- source files inspected
- generated model coverage
- architecture summary
- implemented workflows found
- uncertain or deferred areas
- suspected missing source evidence
- recommended next improvements
- whether Model Weave was effective for this app

Source Links:
For generated files, include ## Source Links where useful.
Use parser-supported tables from the provided guidance.
Prefer actual source paths and symbols.

Validation checklist:
After creating files, inspect the generated Markdown and report:
- frontmatter type/schema is correct
- table headers match provided Model Weave format docs
- no C# / TypeScript array notation like Foo[] in tables
- no Wikilink aliases in tables
- no empty placeholder rows
- DFD flow schemas match FORMAT-dfd_diagram.md
- app_process flow schemas match FORMAT-app_process.md
- every app_process flow endpoint exists as a local step id
- data_object files use ## Notes before ## Source Links
- Japanese prose remains Japanese
- source symbols and file paths are accurate
- no files outside model/ were changed
- no source files were changed
- no git commands were run

Return:

## Generated files
List every created file with one-line purpose.

## Source evidence summary
List the main source files used and what each contributed.

## Architecture summary
Summarize NaviMovie-Maker boundaries and data flow.

## Main workflows modeled
List created process models and what each visualizes.

## Uncertain or deferred areas
List anything not modeled because source evidence was weak.

## Validation result
Report:
- DFD files created: count
- DATA files created: count
- Process files created: count
- Screen files created: count
- Notes files created: count
- table schemas checked: yes/no
- app_process flow endpoints checked: yes/no
- data_object section order checked: yes/no
- no files outside model/ changed: yes/no
- no source files changed: yes/no
- no git commands run: yes/no

End with:
No source files were changed.
No git commands were run.
プロンプトで重視したこと
このプロンプトで重視したのは、AIに「自由に説明させない」ことです。
AIは放っておくと、よくできた説明文は作れますが、後から検証しにくい形になりがちです。
そこで今回は、出力形式をかなり固定しました。
- DFDで境界を出す
- DATAで主要データを出す
- Processで主要処理を出す
- Screenで画面を出す
- Findings noteで不確実点を残す
- Source Linksでソースへ戻れるようにする
このように出力先を決めることで、AIの生成物をModel Weave上で検証できるようになります。
実際に、生成後にはいくつか警告が出ましたが、それらはModel Weaveのプレビューと診断を使って原因を特定し、修正できました。
この「生成して終わり」ではなく、「生成した設計モデルを診断し、修正できる」点が、今回の実験で特に重要だったところです。
まとめ
今回の実験では、NaviMovie-Makerという小規模アプリを対象に、AIとModel Weaveを使ったリバースエンジニアリングを試しました。
結果として、ソースコードと限定されたドキュメントだけから、DFD、DATA、Process、Screenを一括生成できました。
生成物にはいくつか警告がありましたが、Model Weaveの診断によって原因を特定し、修正することができました。
これは、AIを使ったリバースエンジニアリングにおいて重要なポイントです。
AIに任せきりにするのではなく、構造化されたモデルとして出力させ、ツールで検証し、人間がレビューする。
この流れがあれば、既存アプリの理解や保守開発の初期調査をかなり効率化できる可能性があります。
Model Weaveは、AIと人間の間に置く中間表現として、かなり有効に使えそうです。
本記事の関連情報
この記事の対象となったNaviMovieMakerは以下の記事で紹介しています。
本記事のリバースエンジニアリング成果を格納したMarkdownファイルもこちらで紹介しています。
下記の記事で紹介しているリポジトリをcloneし、/modelディレクトリをObsidianのVaultとして開いたうえで、コミュニティプラグインから「Model Weave」を導入する事で様々なビューを試す事ができます。
また、今回の実験で使用したModel Weaveの安全記述ルールは以下のリポジトリに格納しています。

コメント